Visual feature walkthroughs
Reference for the files delivered in Main_File. Documentation updated 22 September 2026. Examples use fictional IDs and balances; replace them with values from your installation.
Visual reference status
The admin images below are actual captures of the public AppChat demo on 19 September 2026. The capture session only navigated pages; it did not modify roles, users, agencies or rooms. Controls depend on the logged-in role, so some action buttons are hidden in the demo.
Before resubmission: actual device captures of gift sending, recharge confirmation, store purchase/equip and VIP purchase/activation still need to be added. The existing promotional mobile illustrations in the installation guide are not evidence of those operational flows. Do not describe this screenshot requirement as completed until these captures are available.
Send a gift
- Sign in on two test accounts and join the same voice room.
- Open the room's gift selector, choose the recipient(s), gift and quantity. For a backpack gift select owned inventory.
- Confirm the coin cost before sending. Cost scales with quantity and number of recipients.
- Send once. Verify the sender balance changes and the recipient/room sees the animation or gift message.
- For a failed send, use the not_enough_coins/invalid_request troubleshooting entry; do not retry blindly after an ambiguous timeout.
Capture needed: recipient + gift + quantity selected; successful gift shown in room with the refreshed balance. Suggested filenames: mobile-gift-select.png and mobile-gift-result.png. Use test users and do not show session tokens.
Developer reference: live/giftList, live/giftBackpack, live/sendGift; roomGift server event.
Recharge the wallet
- Open Wallet and the recharge/package selection view.
- Select a configured product. Confirm the price presented by Google Play/App Store, not an illustrative documentation price.
- Complete a sandbox purchase using the platform tester account.
- Wait for backend verification, then refresh the wallet and payment history. The credited amount must appear once.
- If a purchase is already credited, refresh the balance rather than purchasing again to resolve a repeated_charge message.
Capture needed: actual product list, sandbox purchase confirmation without payment/account details, and updated balance/history. Suggested filenames: mobile-recharge-packages.png and mobile-recharge-result.png.
Developer reference: payment/index, payment/pay, payment/userLog, cash/index. A legacy withdrawal request screen is not a wallet recharge screenshot.
Buy and equip a store item
- Open Store and choose a category such as frames or entrance effects.
- Open an item and inspect price and duration.
- Confirm one purchase for your account; gifting to another user is a separate choice.
- Open Backpack, select the owned item and activate it.
- Reopen the profile or room and confirm the selected effect is visible.
Capture needed: catalog/detail with price, purchase confirmation, and owned item active in Backpack. Suggested filenames: mobile-store-purchase.png and mobile-store-equipped.png.
Developer reference: shop/index, shop/buying, shop/backpack, shop/activeItem. Purchase uses a catalog ID; equip uses an inventory ID.
Upgrade and activate VIP
- Open VIP and review the available tier, benefits, price and duration.
- Choose purchase for yourself, confirm once, then wait for the wallet/profile update.
- If needed use Active on an owned tier. An expired or unowned tier cannot be activated.
- Reopen the profile to confirm the VIP badge and check the expiry/remaining time in the VIP screen.
Capture needed: tier benefits and price, purchase confirmation, active VIP/remaining time. Suggested filenames: mobile-vip-purchase.png and mobile-vip-active.png.
Developer reference: shop/vipList, shop/vipBuying, shop/vipChangeActive. This is a coin-based VIP purchase flow, not an automatically renewing store subscription.
Manage agencies
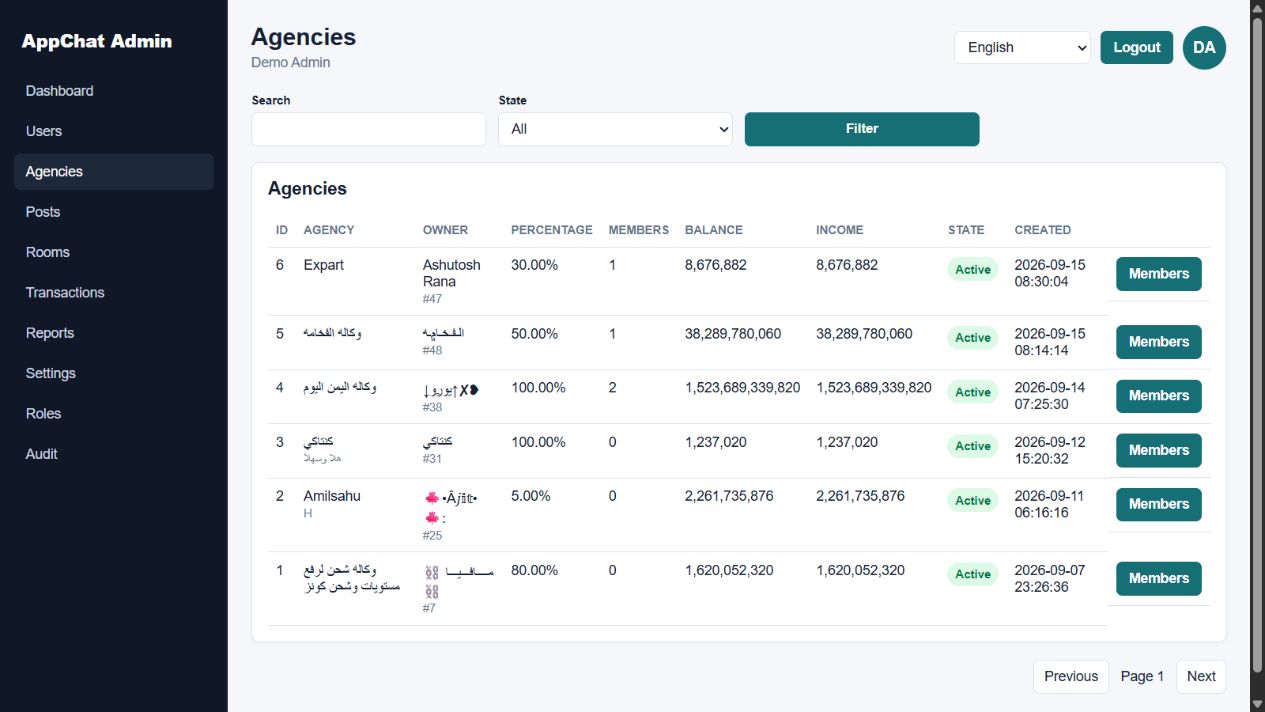
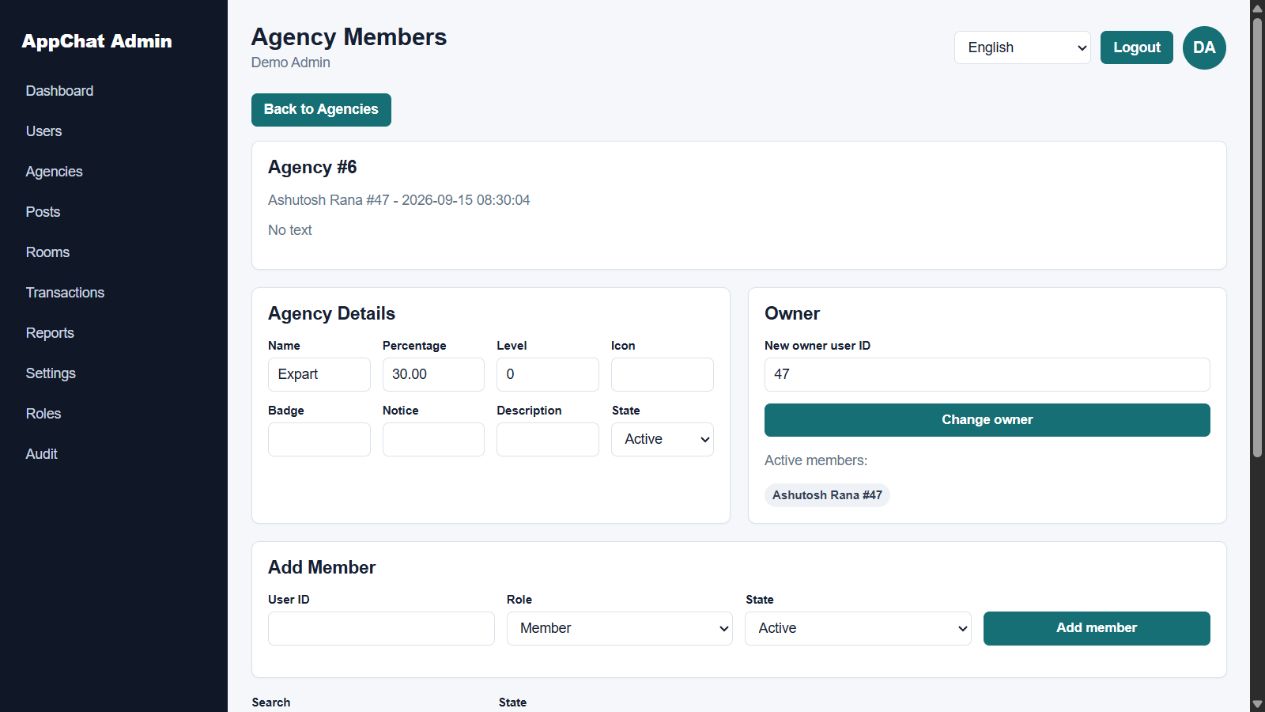
- Use Agencies → Members to open the intended record and verify its ID.
- An authorized operator edits agency details and saves them; changing ownership requires agencies.owner.
- Use Add Member with a test mobile user ID; choose the correct membership role/state. Editing and removing members require separate slugs.
- Reload and verify the agency/member state; confirm the corresponding user's mobile agency profile.
The Community Moderator example does not include agency permissions. See agency access before assigning staff.
Admin moderation screens
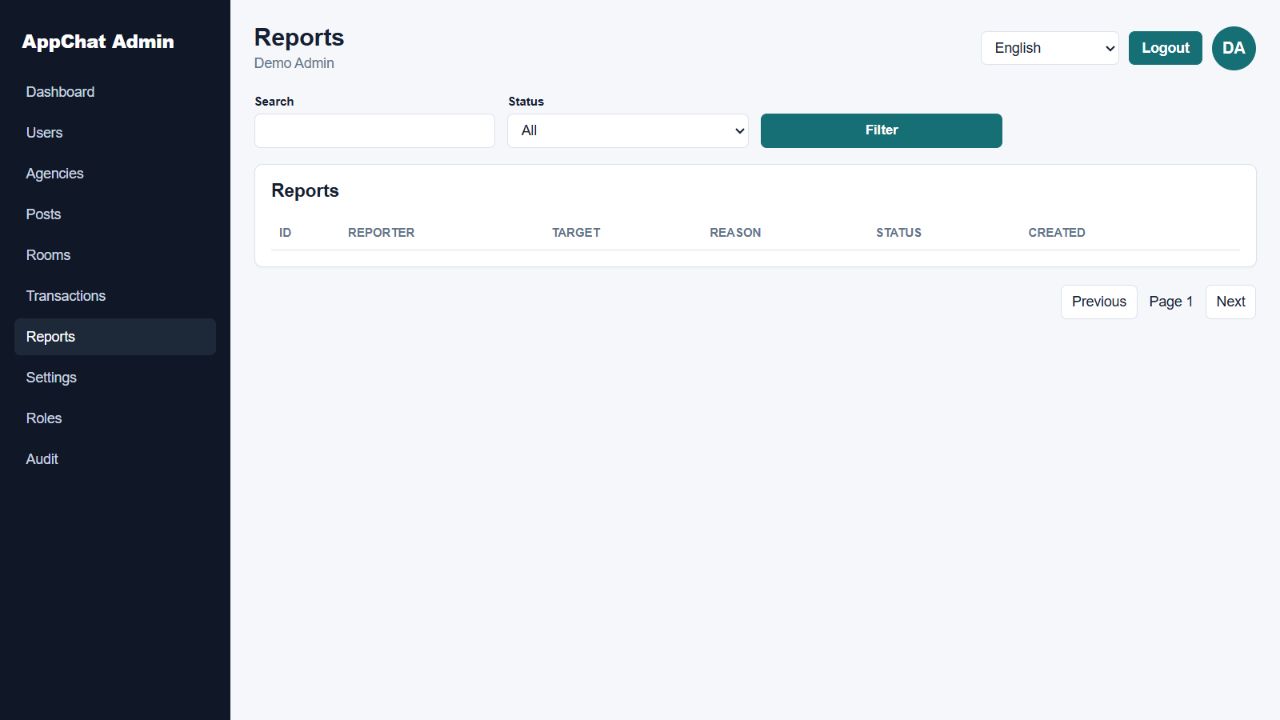
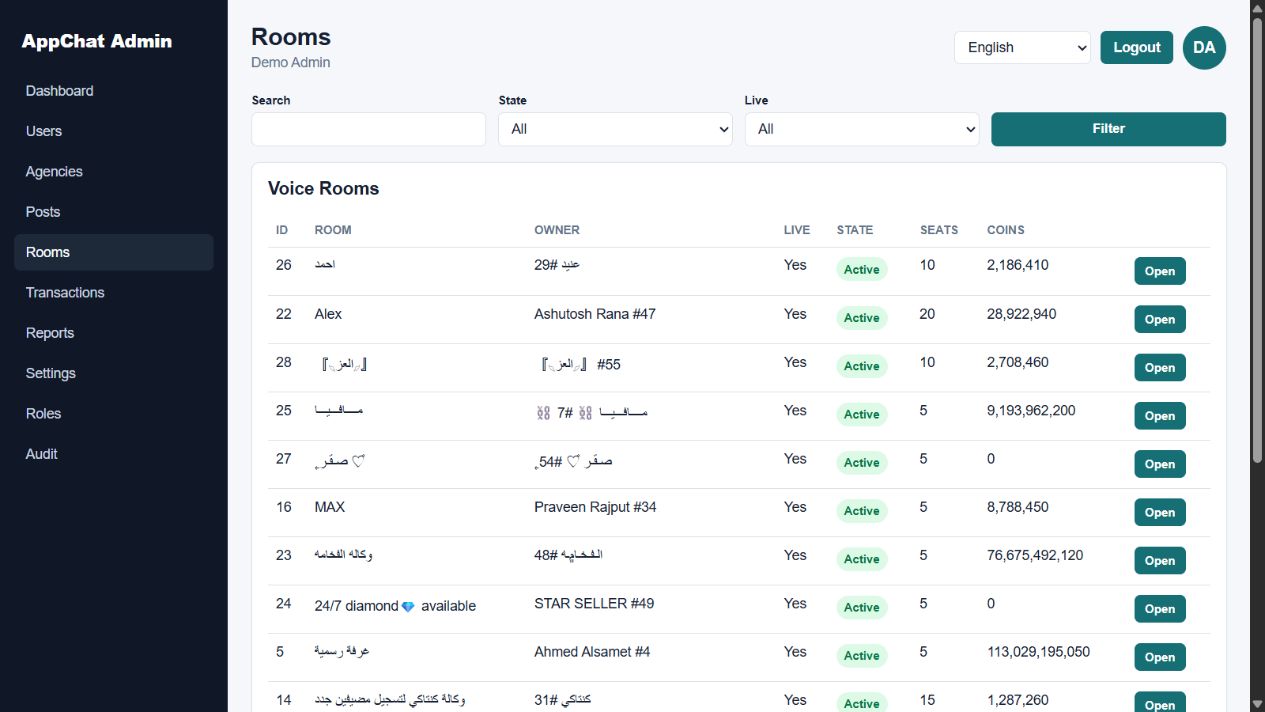
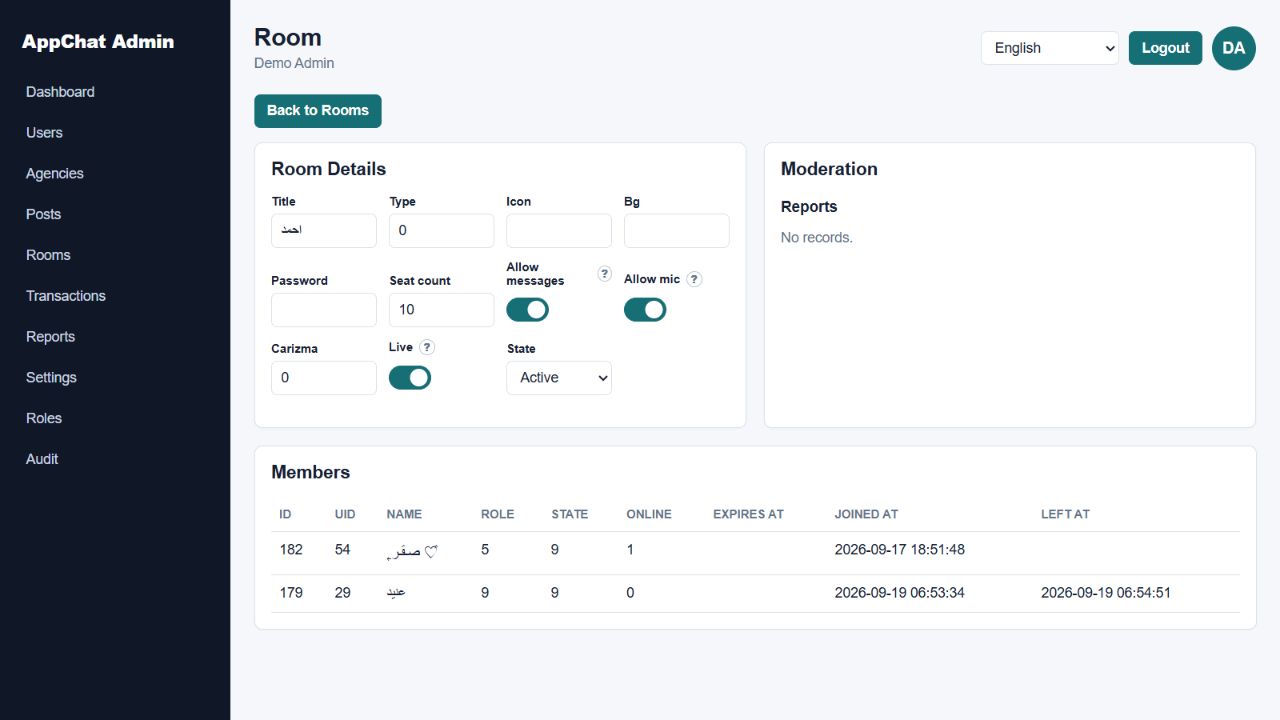
- Open a report and identify its target user, post or room.
- Inspect the target record before acting. Resolve the underlying issue with the intended authorized action.
- Mark the report Handled or Ignored and verify the saved state.
- For a room, distinguish Disable/Enable from permanent Close Room. Close Room has its own confirmation and emits stopRoom; use a disposable staging room for training.
- Check the audit record as an administrator with audit.view.
Additional capture needed for a complete action walkthrough: a staging report before/after resolution and a moderation action panel under the Community Moderator role. Do not change live demo data merely to create an image.
Capture checklist for the package owner
Use the current buyer build and include the GamePix catalogue and game screen in the capture checklist. Use test profiles, the same display language, readable text, and original PNG/JPEG files. Keep at least one “before” selection and one successful “after” result for each mobile flow. Do not fabricate success screens or substitute marketing compositions for device captures.
After adding images under assets/screenshots, replace the capture-needed paragraphs above with actual figures/captions, check them offline at desktop and phone widths, and copy suitable screenshots into the public preview only after reviewing them for private data. Keep the reviewer completion checklist accurate.